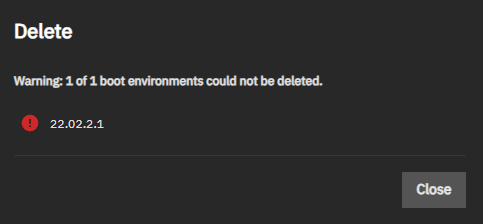
TrueNAS automatically retains copies of previous boot environments following updates and should automatically delete them if there are space constraints. However, in my experience, it rarely does and attempts to manually delete them via the GUI frequently fail with no given or logged cause.
Thankfully, and if you are brave enough, you can manually delete old and redundant boot environments via the CLI.
As always, this post is provided AS IS and you use it at your risk. If your TrueNAS box turns into a lump of glowing slag, it’s on you.
Listing the Boot Environments
Although you may view the current Boot Environments via System > Boot, the most detailed information via the shell. Open a shell via System > Shell. Enter the command zfs list -r boot-pool/ROOT to generate a list of all current boot environments.
Don’t be surprised if you get a list far larger than that shown in the TrueNAS GUI. The generated list will include subsets for each version of TrueNAS installed.
For example, running zfs list -r boot-pool/ROOT on my TrueNAS will return:
root@nyx[~]# zfs list -r boot-pool/ROOT
NAME USED AVAIL REFER MOUNTPOINT
boot-pool/ROOT 8.36G 17.8G 96K none
boot-pool/ROOT/25.04.2.3 2.78G 17.8G 176M legacy
boot-pool/ROOT/25.04.2.3/audit 164K 17.8G 5.02M /audit
boot-pool/ROOT/25.04.2.3/conf 7.15M 17.8G 7.15M /conf
boot-pool/ROOT/25.04.2.3/data 100K 17.8G 360K /data
boot-pool/ROOT/25.04.2.3/etc 7.52M 17.8G 6.55M /etc
boot-pool/ROOT/25.04.2.3/home 0B 17.8G 124K /home
boot-pool/ROOT/25.04.2.3/mnt 96K 17.8G 96K /mnt
boot-pool/ROOT/25.04.2.3/opt 96K 17.8G 96K /opt
boot-pool/ROOT/25.04.2.3/root 72K 17.8G 144K /root
boot-pool/ROOT/25.04.2.3/usr 2.56G 17.8G 2.56G /usr
boot-pool/ROOT/25.04.2.3/var 36.8M 17.8G 3.50M /var
boot-pool/ROOT/25.04.2.3/var/ca-certificates 96K 17.8G 96K /var/local/ca-certificates
boot-pool/ROOT/25.04.2.3/var/lib 27.5M 17.8G 27.2M /var/lib
boot-pool/ROOT/25.04.2.3/var/lib/incus 96K 17.8G 96K /var/lib/incus
boot-pool/ROOT/25.04.2.3/var/log 4.77M 17.8G 4.54M /var/log
boot-pool/ROOT/25.04.2.3/var/log/journal 4.46M 17.8G 4.46M /var/log/journal
boot-pool/ROOT/25.04.2.4 2.78G 17.8G 176M legacy
boot-pool/ROOT/25.04.2.4/audit 172K 17.8G 5.50M /audit
boot-pool/ROOT/25.04.2.4/conf 7.15M 17.8G 7.15M /conf
boot-pool/ROOT/25.04.2.4/data 108K 17.8G 360K /data
boot-pool/ROOT/25.04.2.4/etc 7.54M 17.8G 6.55M /etc
boot-pool/ROOT/25.04.2.4/home 0B 17.8G 124K /home
boot-pool/ROOT/25.04.2.4/mnt 96K 17.8G 96K /mnt
boot-pool/ROOT/25.04.2.4/opt 96K 17.8G 96K /opt
boot-pool/ROOT/25.04.2.4/root 8K 17.8G 152K /root
boot-pool/ROOT/25.04.2.4/usr 2.56G 17.8G 2.56G /usr
boot-pool/ROOT/25.04.2.4/var 36.0M 17.8G 3.51M /var
boot-pool/ROOT/25.04.2.4/var/ca-certificates 96K 17.8G 96K /var/local/ca-certificates
boot-pool/ROOT/25.04.2.4/var/lib 27.5M 17.8G 27.2M /var/lib
boot-pool/ROOT/25.04.2.4/var/lib/incus 96K 17.8G 96K /var/lib/incus
boot-pool/ROOT/25.04.2.4/var/log 4.04M 17.8G 5.21M /var/log
boot-pool/ROOT/25.04.2.4/var/log/journal 3.77M 17.8G 3.77M /var/log/journal
boot-pool/ROOT/25.04.2.6 2.80G 17.8G 176M legacy
boot-pool/ROOT/25.04.2.6/audit 6.20M 17.8G 5.50M /audit
boot-pool/ROOT/25.04.2.6/conf 7.15M 17.8G 7.15M /conf
boot-pool/ROOT/25.04.2.6/data 848K 17.8G 360K /data
boot-pool/ROOT/25.04.2.6/etc 7.47M 17.8G 6.55M /etc
boot-pool/ROOT/25.04.2.6/home 252K 17.8G 124K /home
boot-pool/ROOT/25.04.2.6/mnt 96K 17.8G 96K /mnt
boot-pool/ROOT/25.04.2.6/opt 96K 17.8G 96K /opt
boot-pool/ROOT/25.04.2.6/root 340K 17.8G 152K /root
boot-pool/ROOT/25.04.2.6/usr 2.56G 17.8G 2.56G /usr
boot-pool/ROOT/25.04.2.6/var 38.7M 17.8G 4.31M /var
boot-pool/ROOT/25.04.2.6/var/ca-certificates 96K 17.8G 96K /var/local/ca-certificates
boot-pool/ROOT/25.04.2.6/var/lib 27.5M 17.8G 27.2M /var/lib
boot-pool/ROOT/25.04.2.6/var/lib/incus 96K 17.8G 96K /var/lib/incus
boot-pool/ROOT/25.04.2.6/var/log 6.68M 17.8G 5.31M /var/log
boot-pool/ROOT/25.04.2.6/var/log/journal 544K 17.8G 544K /var/log/journal
In the example above, there are three distinct boot environments: 25.04.2.3, 25.04.2.4 and 25.04.2.6
Deleting a Boot Environment
!! IMPORTANT !!
- Make a backup of your TrueNAS configuration before proceeding. See https://www.truenas.com/docs/scale/gettingstarted/configure/setupbackupscale/#backing-up-the-system-configuration
- Make a note of your current boot environment name and do not delete it.
- I recommend retaining at least one previous known good boot environment.
From the list of boot environments (see above), enter the command zfs destroy -r boot-pool/ROOT/boot_name where boot_name is the principal boot name to delete. For example, if I wanted to delete the boot environment named 25.04.2.3 the command would be:
zfs destroy -r boot-pool/ROOT/25.04.2.3
At the time of writing, there is no confirmation shown when deleting a boot environment. To check if an environment has been deleted, use zfs list -r boot-pool/ROOT command
Final Thoughts
As a general sanity check, I always restart a TrueNAS instance once I have deleted any boot environments. If your TrueNAS box fails reboot, then you’ve probably managed to delete your current boot environment..